


Composting Lessons in a Strange Year
Old Dog Learns New Trick

I’ve been a reasonably serious and committed composter for about twenty-five years, starting around the time I converted to a more intentional form of organic gardening. My family can attest to that — over the years they grew accustomed to the gross container of kitchen waste under the sink, and the frequent trips to empty it into the much, much grosser trash can out in the yard (fortunately, it is well-sealed). The trash can is a holding area. As the can fills up, I distribute its contents into new (or, as we will soon see, “remanufactured”) compost piles a few times a year. Fortunately for my kids, they never had to witness that process; it is not for the squeamish.
Around this time of year, in late October through early December, I will typically build new compost piles. With an ample supply of fall leaves, this is a great time to do that. But I am doubly motivated around this time because the kitchen waste holding area is typically filling up from a summer of sweet corn and garden vegetables, all of which generate loads of compostable material. So I try to empty it before the holiday season. That way, it can fill up again over the winter, when snowpack and general weather conditions often make it impossible to build new compost piles. By spring I am ready to reboot the composting system, with a… uh… “fresh” batch of raw materials in tow.
All of this was weighing on my mind last week, as I pondered and prioritized my endless to-do list. Composting for backyard gardeners requires some project management. As you can probably glean from the photo below, I use a two-bin system. At this point in the season, a semi-complete batch (which I start in late spring) usually awaits my attention. Depending on its "doneness", I will either turn it to the bin on the other side to finish, or distribute the material to my garden boxes (which in a more typical year would be mostly cleared out by now, save for some fall lettuce — but that is a subject for another post). A sequence of events is in play; I need to dispense with the batch in process before I can move forward with a new one. Before I could schedule my next steps, I needed to assess the situation on the ground (literally) in the composting area.
The 2024 gardening season in the Mid-Atlantic was atypical. Dry conditions began in late spring, persisted through most of the summer, worsened in the fall, and are showing no sign of easing any time soon — which is to say that we are now in a serious drought in these parts. I brought my trusty pitchfork back to the composting area, where the pile I built in late spring seemed reasonably happy at first glance. But looks can be deceiving. When I began to dig into it, I discovered a mummified carcass of a compost heap, frozen in time. The composting process clearly had progressed to a certain point, but then simply stopped sometime during the season when moisture levels dropped to more or less nothing.
As I continued to dig, I realized that it was bone dry to the bottom. I extracted chunks of partially decomposed — but now fully mummified — kitchen waste, along with the remains of other materials that I had included in the pile months ago. Everything was in a weird state of suspended animation, desert dry, awaiting rehydration.
So I needed a plan. With no hose handy, I could just dump a few buckets of water into the pile, but I knew that would be a fool’s errand — there was no way that a few buckets of water would fully hydrate the bulk of the material. And I didn’t feel like hauling heavy buckets of water to the back of the property, particularly if they would make no difference. So I shelved that plan. Instead, I opted for a reconstruction project, something that I had never tried in my decades of composting. I reasoned that my trusty chipper/shredder handles dry material very efficiently, so it should be fairly easy to reprocess the entire compost pile through the shredder, thereby pulverizing and recirculating all of the clumps of desiccated ick therein. For bonus points, I could dispose of the current trash can of gross kitchen waste within the layers of the reprocessed pile.
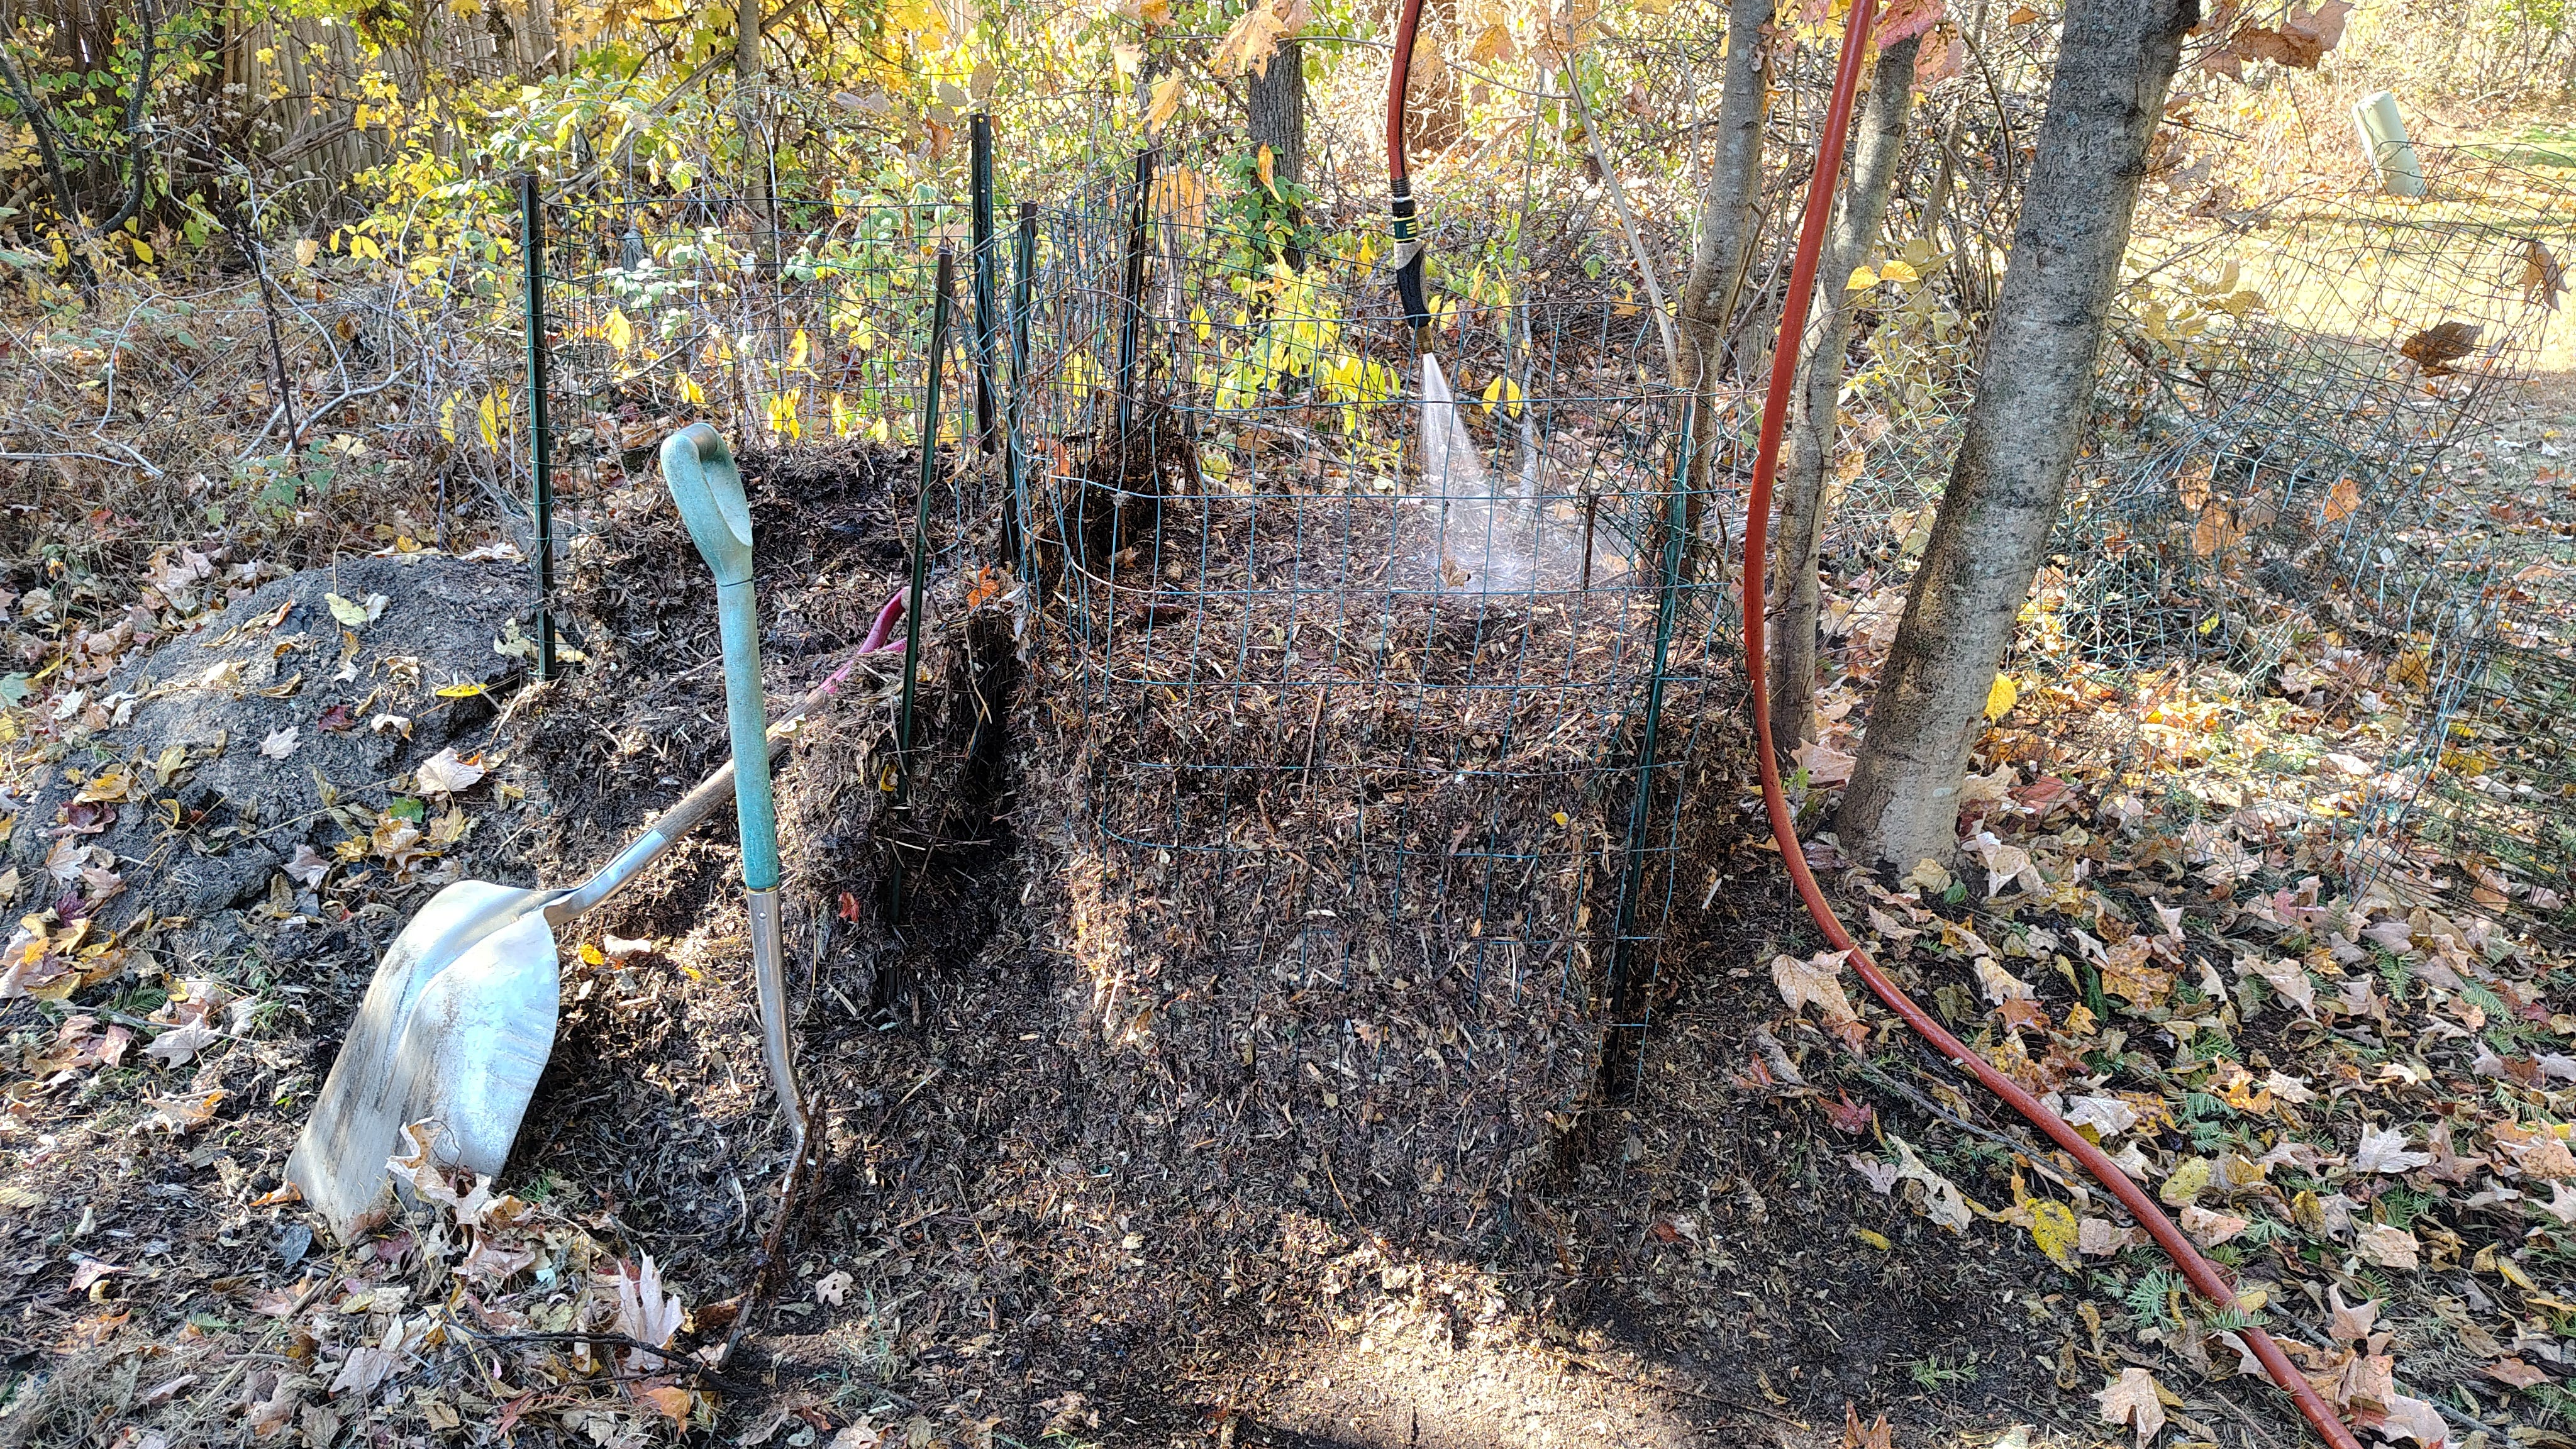
That sounded like a great plan, except for the little problem of water. The kitchen waste has moisture, but not nearly enough to rehydrate a pulverized compost mummy. And the hose faucet is at least two hundred feet away from the composting area. Did I really want to run multiple hoses that far, just to turn a pile of dry & clumpy icky stuff into a pile of moist & uniform icky stuff? Well, if you’re a serious organic gardener, there is only one correct answer to that question. So I sucked it in and ran the hose. Here’s a photo of the setup:
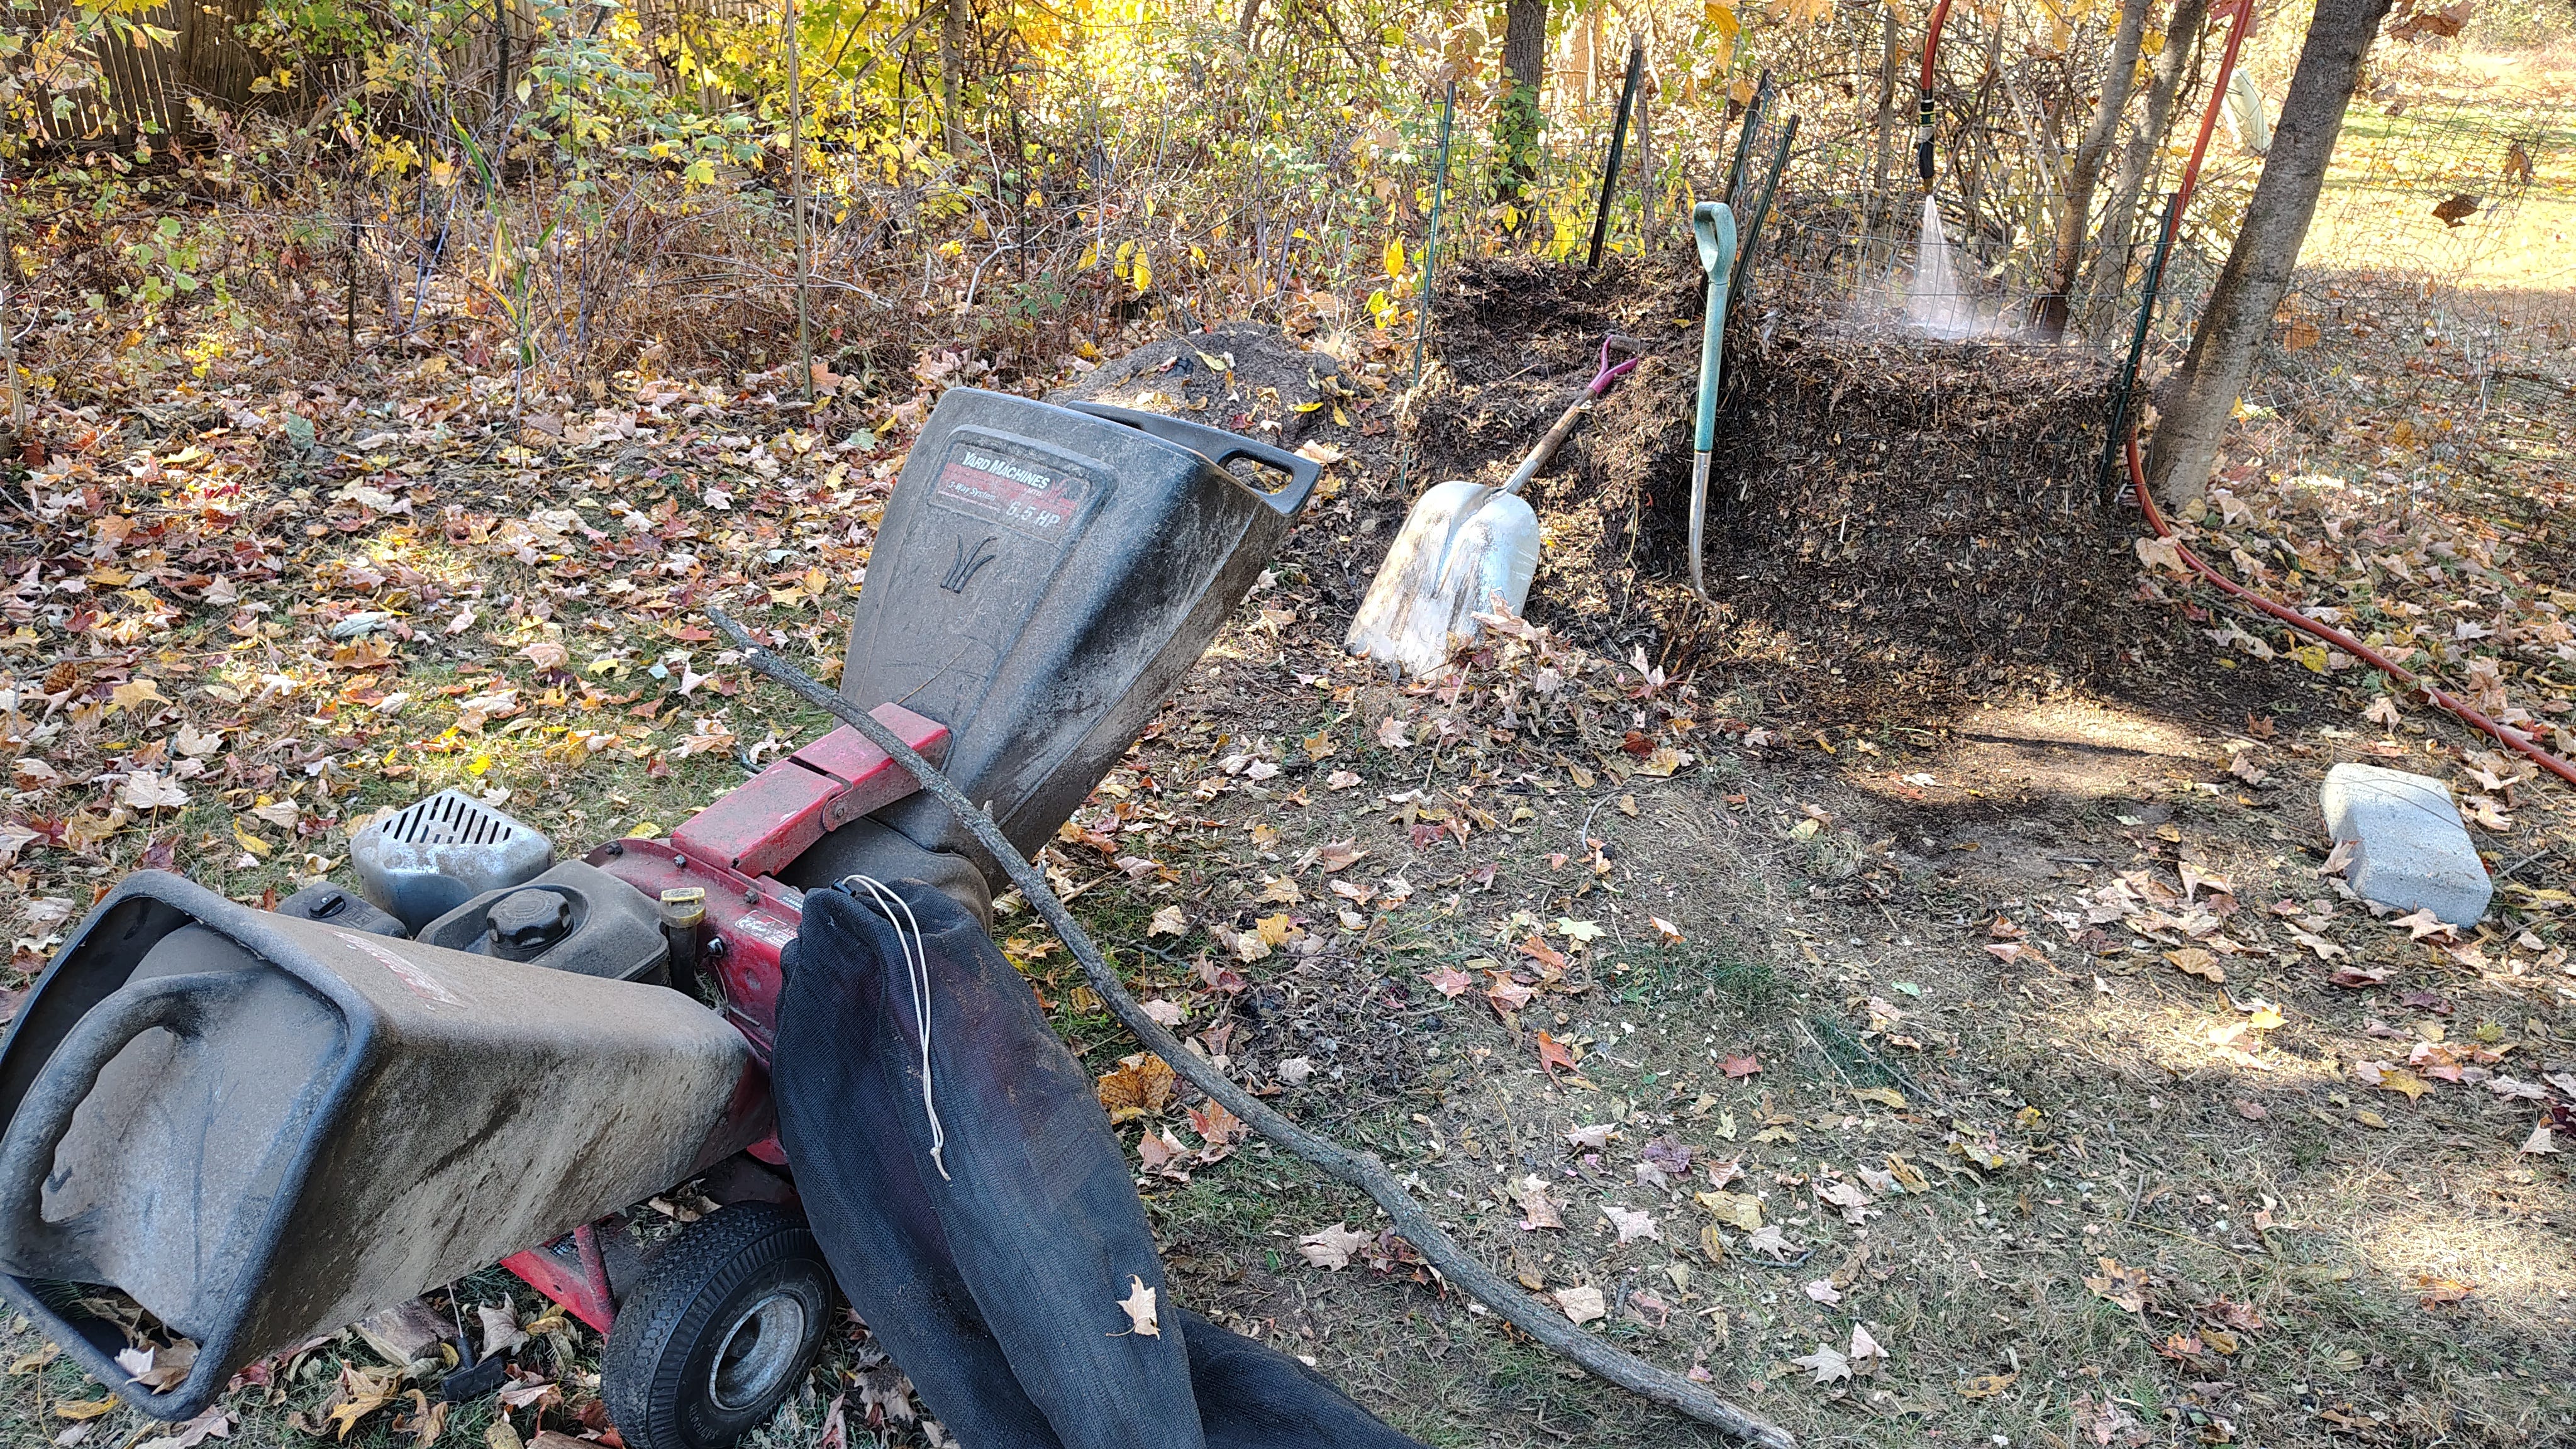
The photo shows the process nearing completion. You can see the chipper in the foreground, the newly processed compost pile in the background (on the right side), and a garden hose discharging into the pile. But the photo doesn’t convey the details, which are important, so let’s turn our attention to those details and a few lessons learned.
Lesson #1: Composting requires moisture throughout the process.
As my experience this season shows, when the moisture disappears, the decomposition process disappears with it. In a typical year, rainfall will take care of the situation if you start with moist ingredients. In a drought? Not so much.
Lesson #2(a): You need to start with moist ingredients.
If you start with dry ingredients, little or no composting will occur, at least in any reasonable time frame. Oh, sure, if you leave a pile of shredded leaves for a few years, it will disintegrate eventually and return to the soil. But gardeners need to make compost in weeks and months, not years. My experience this year extends to more typical situations in the fall. Very often I will shred a mountain of dry leaves to use in a new compost pile. I am often in a rush this time of year, and I sometimes don’t bother to moisten the material. And you know what I get in the spring? I get leaf mulch. Leaf mulch can be useful, but it isn’t compost.
Lesson #2(b): Moistening dry ingredients is more work than you think.
It takes quite a bit of water to moisten a pile of dry, shredded leaves. A bucket or two of water will not get the job done, nor will simply spraying a large, self-insulating pile of leaf material from the top. You not only need a hose, you need to build the pile in layers, taking great care to mix each layer thoroughly with water as you go. Only then will your material be ready to burn.
Before I get to the final lesson, let’s examine that phrase “ready to burn”. What do I mean by that? Well, almost exactly what it says, but not quite. A properly constructed compost pile will begin to generate heat within a day or two of construction — a lot of heat, in some cases. This happens because the chemical reactions that microbes use to break down the organic molecules in the pile are exothermic (meaning they give off heat). Much of the initial decomposition occurs this way. The pile then cools down, at which point worms, insects and other mobile microfauna (I believe the technical term is “creepy crawlies”) enter the picture and finish the job. While it is possible to make compost without this initial heating phase, the best compost follows this cycle.
So this brings me to a couple final lessons.
Lesson #3: You can (and should) rebuild a dead and dry compost pile.
As I discovered this week, it turns out that this heating cycle can happen even with the reconstituted remains of a pile that already went through a heating cycle. Granted, I did add some kitchen waste to the new pile. But, for reasons that I won’t bother to explain here, I don’t think the kitchen waste was entirely responsible for the heating response. The fact that the heating cycle resumed shows just how much the decomposition process slows down — and eventually ceases — when the pile dries out completely. Successful composting requires moisture from start to finish.
Lesson #4: In a drought, monitor your well-made compost piles carefully.
If you have been reading carefully, you might be thinking that I mean “monitor them carefully to maintain moisture levels”. And I suppose that is true if drought conditions persist for months (after all, that is exactly what happened to me this summer). But what I’m really getting at is the threat of fire. Compost piles can produce enough heat to create combustion. If a damp compost pile is surrounded by a dead and dry landscape wracked by drought, there is a small but non-zero chance of causing a brush fire. If you choose to build compost piles in drought conditions, you must monitor things every day until the heating cycle begins to subside. It is also a good idea to hose down the immediate area around the pile once in a while, as an added measure of safety.
If you have never built a proper compost pile and experienced the heat it can generate, you might think this concern is farfetched. It isn’t. These things routinely heat up to the point where you cannot put your hand into them. The odds of starting a fire with a compost pile are small, but it is possible. And the odds increase with the size of the pile that you build. Something the size of the one in the earlier photos is unlikely to cause a problem. But the threat increases with larger piles.
Final Thoughts
Fall is here, and fall leaves coat the landscape. If you have:
the time
a way to supply the required moisture
the willingness to observe fire safety guidelines (if you are in a drought region),
then nothing will boost next year’s garden more effectively and sustainably than converting those leaves into gardening gold.
This discussion is not a complete primer on composting, but I hope it piques enough interest for a few people to take the plunge into the world of serious, chemical-free soil management. You will wonder how you ever gardened any other way. Sure, it requires some hard work — and, as we saw here, some extra attention in drought years — but there is no better gift that you can give to your soil, if your time and circumstances permit it. For more info, please join my gardening group on Facebook here. Together we will change the world, one composter at a time ;-)
For more reflections about gardening and the broader life lessons it bestows on us, feel free to check out my online book, Life Lessons of a Backyard Gardener, which I am publishing here, one chapter at a time.